
Before you can fix your wood floors, you have to play detective. The first and most important step is figuring out exactly what you’re dealing with. Knowing the type and severity of the damage will guide every decision you make, from the tools you’ll grab to whether this is a simple weekend job or something you should hand off to a pro.
I’ve seen it time and time again: people rush this first step and end up with a bigger mess than they started with. You can’t treat a light scratch the same way you’d tackle a deep gouge, and that dark spot on the floor could be a simple spill or a warning sign of serious water damage.
Assessing Your Wood Floor Damage
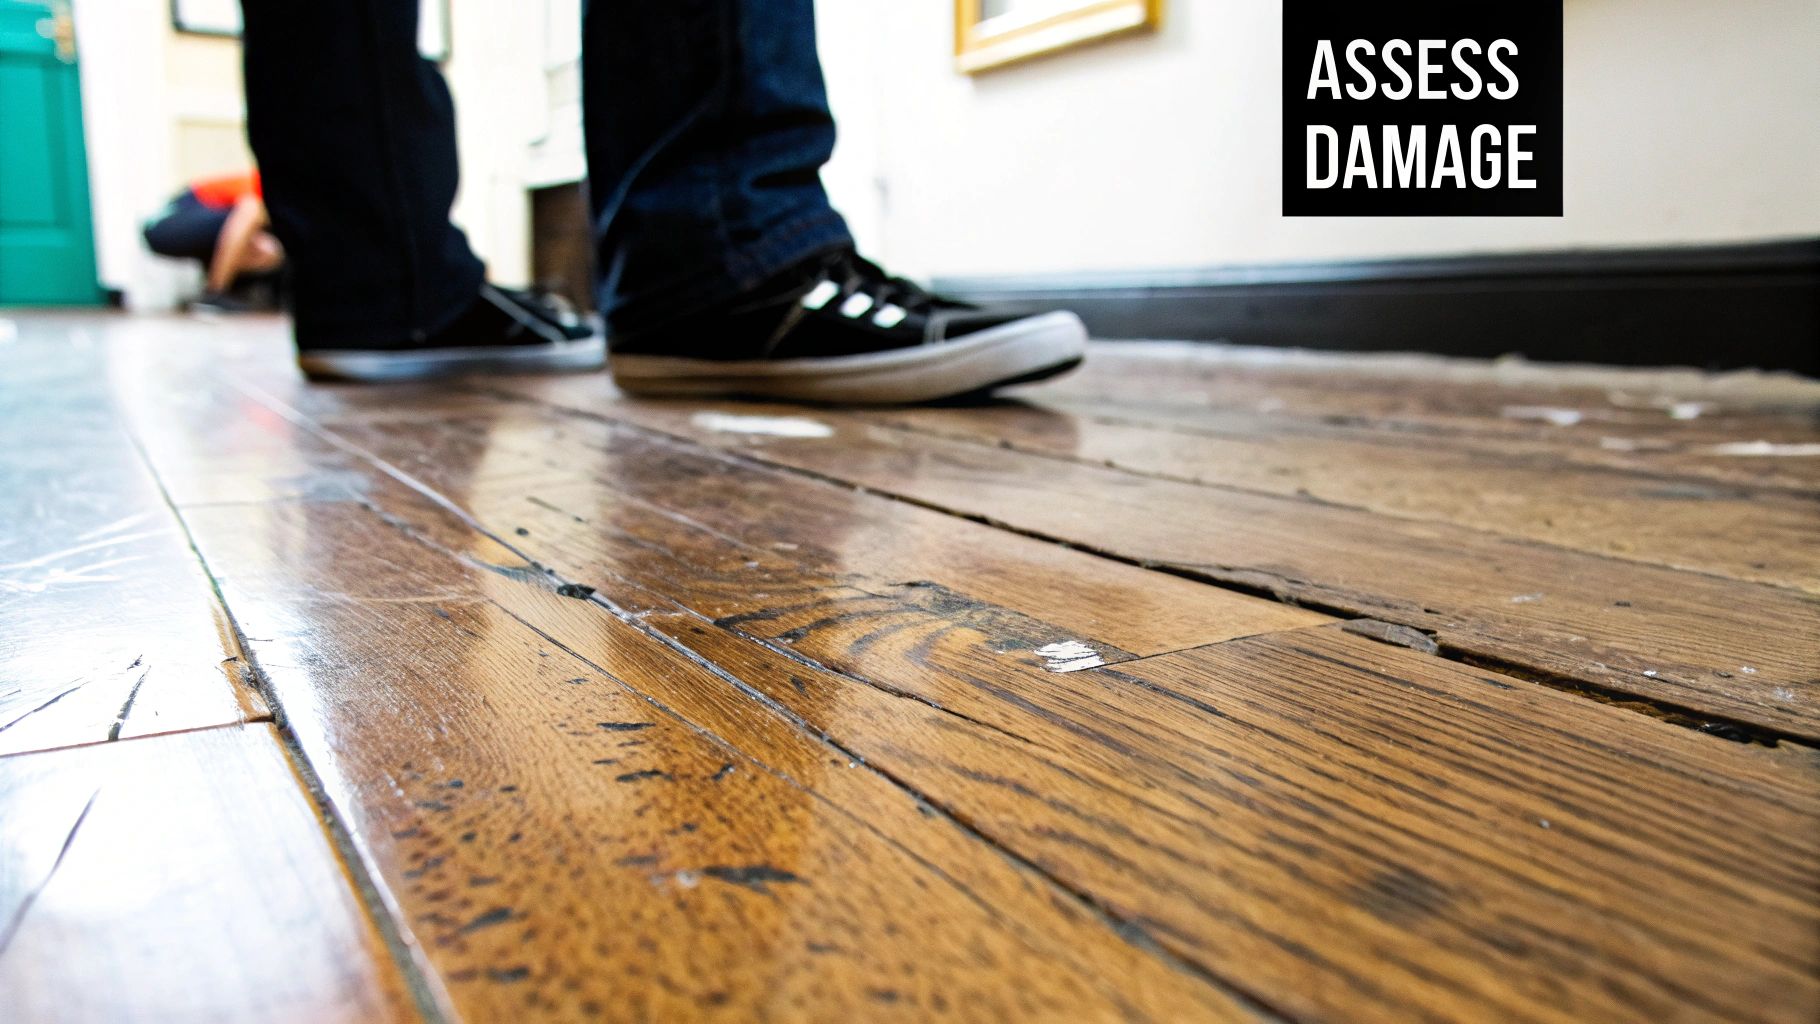
So, let’s get down to business. The best way to start is to get on your hands and knees with a good, bright light. You need to see every little detail up close.
Identifying Common Types of Damage
As you inspect the floor, you’ll likely run into one of these common culprits:
- Surface Scratches: These are the everyday battle scars from pet claws, dragged furniture, or grit tracked in on shoes. They’re annoying but shallow, usually only affecting the top protective layer (the polyurethane). The wood underneath is typically unharmed.
- Deeper Scratches or Gouges: This is when something has cut right through the finish and into the wood fibers. A quick way to check is to run your fingernail over it—if it catches, you’ve got a deeper issue. The exposed wood inside the gouge often looks lighter and raw.
- Water Stains: Water leaves behind distinct calling cards. Dark, almost black, marks mean the water seeped into the wood itself and reacted with its natural tannins. If you see a milky-white ring or spot, you might be in luck; that often means the moisture is just trapped in the finish.
- Gaps Between Boards: Wood is a natural material that breathes, so small, seasonal gaps are perfectly normal. But if you’re seeing large, persistent gaps that don’t go away, it could signal a problem with your home’s humidity levels or the original installation.
Key Takeaway: The depth of a scratch is the primary factor in choosing a repair method. If it’s just in the finish, a simple touch-up may suffice. If it’s into the wood, you’ll need filler and stain.
Taking the time for a proper diagnosis is what separates a successful DIY repair from a disaster. It’s no surprise that the professional wood floor repair market is booming—it was valued at around $3.5 billion in 2022 and is expected to hit $5.7 billion by 2030. People value their floors and want them fixed right. For more details on this trend, you can see the analysis over at Verified Market Reports.
Determining the Repair Path
To make things a bit clearer, here’s a quick chart to help you match the damage to the right fix.
Quick Damage Assessment and Repair Path
This table helps you quickly identify your floor’s damage and understand the most effective repair approach and its typical difficulty level.
| Type of Damage | Common Cause | Recommended Repair Approach | DIY Difficulty |
|---|---|---|---|
| Surface Scratches | Pet claws, grit, light furniture scuffs | Finish touch-up marker or polish | Easy |
| Deep Gouges | Dropped objects, heavy furniture drag | Wood putty, color-match stain, refinish | Medium |
| White Water Stains | Spills, condensation (moisture in finish) | Gentle heat (hair dryer), mild abrasive | Easy to Medium |
| Black Water Stains | Leaks, pet stains (damage to wood) | Sanding, wood bleach, potential board replacement | Difficult |
| Gaps Between Boards | Humidity changes, installation issues | Wood filler strips or ropes, humidity control | Medium |
Ultimately, choosing your path comes down to being realistic. A single deep gouge in the corner of a room? That’s a perfect DIY project using some wood putty and a bit of patience. But if your floor is covered in scratches, has widespread water stains, or boards are buckling from a leak, a full-room refinish or a call to a professional is the smarter move.
Being honest with yourself about the scope of the job and your own comfort level is the key to getting a beautiful, long-lasting result.
Your Essential Toolkit for Floor Repairs
Before you even think about starting a repair, let’s talk about your toolkit. Showing up with the right supplies is the difference between a frustrating, half-finished job and a smooth, professional-looking repair. When you’re tackling damaged wood floors, your tools are your best friends. The goal isn’t just to have a pile of gear, but to know exactly what each tool does and when to use it.
Having the right equipment is a huge part of the home improvement culture, and for good reason. North America is leading the charge in the global wood floor renovation market, and that’s largely driven by a strong housing market and homeowners who are serious about maintenance. Folks in the U.S. spend a lot on sanding, refinishing, and repairs to keep their floors looking great. You can actually see the numbers on what drives floor renovation spending if you’re curious.
Fillers and Compounds for Flawless Fixes
Not all dings and gouges are the same, so the stuff you use to fix them shouldn’t be, either. The biggest point of confusion I see is between wood filler, wood putty, and epoxy. Getting their purpose straight is the first step to a successful repair.
- Wood Filler: Think of this as your pre-finish workhorse. It’s usually a water or solvent-based paste that goes on soft and dries rock-hard. You absolutely want to use this before you sand and stain, because it’s designed to absorb stain. It’s perfect for filling smaller cracks, nail holes, or gouges in unfinished wood or on a floor you’re about to completely sand down.
- Wood Putty: This is your go-to for finished floors. Unlike filler, putty is an oil-based compound that stays flexible and doesn’t harden. That’s a huge advantage because it moves with the natural expansion and contraction of the wood. It comes in a ton of pre-mixed colors to match your existing stain, making it ideal for quick, minor touch-ups.
- Two-Part Epoxy: When you’ve got a real problem—like big, deep cracks, areas of wood rot, or a massive gouge—epoxy is what you bring to the fight. It’s a mix of a resin and a hardener that creates an incredibly strong, durable bond. Once it cures, you can sand it, drill it, and stain it just like real wood. It’s a true heavy-duty solution.
Pro Tip: A word of caution on stainable wood filler: it almost always dries a bit lighter than the final stained wood. My advice? Always, always test your filler and stain combo on a scrap piece of wood or in a hidden spot, like a closet corner, to make sure you get a perfect match.
Tools for Application and Finishing
Beyond the fillers themselves, a few other key tools will make or break your repair job. To make sure your fixes hold up, you need quality gear. You can find a great selection of top-tier tools and equipment that the pros use.
Here’s what your basic kit should have:
- Putty Knives: I strongly recommend flexible plastic putty knives. Metal ones can easily scratch the surrounding finish if you’re not careful, but plastic gives you great control without the risk.
- Sandpaper: Don’t just grab one kind. You’ll want a few different grits. A medium grit, around 120, works well for smoothing down hardened filler. Then, switch to a fine grit—220 or higher—to feather the edges of the repair into the existing floor for that invisible blend.
- Shop Vacuum: Keeping your work area clean isn’t just about being tidy; it’s critical for a good repair. A shop vac with a brush attachment is perfect for sucking up every last bit of dust and debris before you lay down any filler or finish.
Safety Gear Is Non-Negotiable
Finally, don’t ever skimp on safety. I know it’s easy to think, “it’s just a small patch job,” but you’re still dealing with fine dust and chemical fumes that you don’t want in your body.
Your must-have safety list is short but critical:
- Safety Glasses: Protects your eyes from wood dust, debris, and any accidental splashes from stains or sealers.
- Dust Mask or Respirator: Fine wood dust is no joke, and neither are the fumes from finishing products. A good N95 mask is the bare minimum.
- Gloves: A simple pair of nitrile gloves will keep stains, solvents, and epoxy off your skin, preventing irritation and making cleanup way easier.
And don’t forget your most important safety tool: good old-fashioned ventilation. Always crack open a few windows and, if you can, use a fan to create a cross-breeze when you’re working with any kind of chemical. With the right tools, products, and a little bit of caution, you’ll be ready to tackle those floor repairs like a pro.
Fixing Common Scratches, Gouges, and Stains
Alright, with your toolkit assembled, it’s time to get your hands dirty. Every wood floor has a few stories to tell through its imperfections, but let’s be honest—some stories are better left untold. That deep scratch from moving the sofa or the dark ring from a forgotten plant pot? We can make those disappear.
The real secret to learning how to fix common hardwood floor repair issues is knowing which technique to use for which problem. A light scuff just needs a gentle touch, but a deep gouge is a different beast entirely, requiring a more structural approach.
Making Minor Scratches Disappear
Light surface scratches are, without a doubt, the most frequent complaint I hear from homeowners. These marks usually only affect the top layer of the finish without actually touching the wood fibers. This is fantastic news because it means the fix is often surprisingly simple.
For the faintest of scratches, you can start with a trick that sounds like an old wives’ tale, but it works. Try rubbing the shell-free meat of a walnut or pecan directly over the scratch. The natural oils sink in, often filling and darkening the blemish just enough to make it vanish.
If that little trick doesn’t cut it, your next best friend is a wood floor touch-up marker or crayon. These are made specifically for this job and come in a whole spectrum of wood tones.
- Color Matching is Key: Always pick a marker that’s a shade lighter than your floor. You can easily build up the color with a few passes, but trying to lighten a repair that’s too dark is a real headache.
- Stay in the Lines: Carefully draw along the scratch. Immediately wipe away any excess with a clean, soft cloth to avoid creating a “halo” around the repair.
- Buff It Out: Once the marker is dry, give the area a gentle buff with another clean cloth. This helps the repair blend seamlessly with the floor’s original sheen.
Handling Deeper Gouges and Cracks
When a scratch is deep enough that you can catch your fingernail on it, you’ve gone past the finish and into the wood itself. This calls for more than a marker; you need to fill the void. This is where your wood putty comes into play.
Using wood putty correctly is a bit of an art, but it’s one you can definitely master. The goal is to create a level, durable surface that looks and feels like it was always there. First things first, get your shop vacuum and thoroughly clean any dust or debris out of the gouge.
Next, grab a flexible plastic putty knife and press the putty firmly into the damaged spot. It’s always better to slightly overfill it, as most putties shrink a bit as they dry. For really deep gouges, don’t try to fill it all at once. Apply the putty in thin layers, letting each one dry completely before adding the next. This creates a much stronger, more stable repair.
Expert Insight: Patience is a virtue here. Don’t rush the drying time. Check the manufacturer’s directions, but most putties need several hours to cure completely. If you try to sand it too soon, you’ll end up with a gummy, uneven mess that’s a pain to fix.
Once the putty is rock-hard, you can sand it down. Using 120-grit sandpaper, gently sand the filled spot until it’s perfectly flush with the surrounding floor. Always sand with the grain of the wood. For a professional-level finish, follow up with 220-grit sandpaper to get it ultra-smooth, feathering the edges to blend the repair seamlessly. A final vacuum, and you’re ready for a matching stain and topcoat.
Erasing Stubborn Water Stains
Water stains are a classic homeowner frustration, but they are fixable. The right repair method depends entirely on the color of the stain. White, cloudy marks usually mean moisture is just trapped in the finish. Dark, black stains, however, are a sign that water has soaked deep into the wood fibers themselves.
For those ugly dark stains, you’ll need to be a bit more aggressive. This process involves stripping the old finish and treating the wood directly.
- Sand the Affected Area: Start by hand-sanding the stained spot with medium-grit sandpaper. You need to remove the topcoat to get to the raw wood.
- Apply a Wood Cleaner: Treat the sanded area with a specialized wood cleaner, preferably one containing oxalic acid. This chemical works wonders at neutralizing the reaction that causes those black stains. Follow the product directions carefully and let it do its job.
- Neutralize and Dry: After the treatment, you need to neutralize the acid. A simple solution of baking soda and water works perfectly. Wipe it on, then let the wood dry completely for at least 24 hours.
- Re-Stain and Finish: Once it’s bone dry, give the spot one last light sanding. Then, carefully apply a matching stain and several coats of polyurethane to seal your repair and protect it from any future spills.
Alright, let’s move on to the bigger stuff. Beyond the simple scuffs and surface-level scratches are the repairs that can make a homeowner a little nervous. I’m talking about those noticeable gaps that show up between your floorboards or, even more serious, a board that’s just too far gone to be saved.
These might sound like jobs for a pro, but with a bit of patience and the right know-how, they’re absolutely something you can handle. Getting a grip on how to fix these issues yourself can be the difference between a satisfying weekend project and a massive bill for a full-floor replacement.
First things first, you have to play detective. Why are the gaps there in the first place? Almost always, the culprit is humidity—or a lack thereof. Wood is a natural material, and it breathes. It swells up when the air is humid and shrinks when it’s dry. A little seasonal movement is totally normal. But if you’re seeing wide, persistent gaps, it’s a huge clue that your home’s air is probably too dry.
What to Do About Gaps Between Floorboards
Before you grab the wood filler, take a moment. Are these gaps only showing up in the dead of winter, then magically shrinking come summer? If so, they’re seasonal. Forcing a hard filler in there is a mistake—when the wood expands again in the summer humidity, it’ll have nowhere to go and could end up buckling.
The real long-term fix here is to manage your home’s environment. A good humidifier can make a world of difference. Your goal is to keep the humidity in a stable 30-50% range year-round.
For gaps that are there to stay, you’ve got a couple of great options:
- Color-Matched Filler Ropes: For wider gaps, these are a fantastic solution. They’re essentially flexible foam ropes that you push down into the gaps. They compress and expand right along with the wood, which prevents future issues, and you can find them in tons of colors to get a good match.
- Flexible Wood Filler: If you’re dealing with smaller, more stable gaps, a quality wood filler can do the trick. The key word here is flexible. You need a product specifically designed to handle the minor, natural movement of a wood floor.
This picture gives you a good idea of how to apply filler. It’s a common method for smaller cracks and gaps.
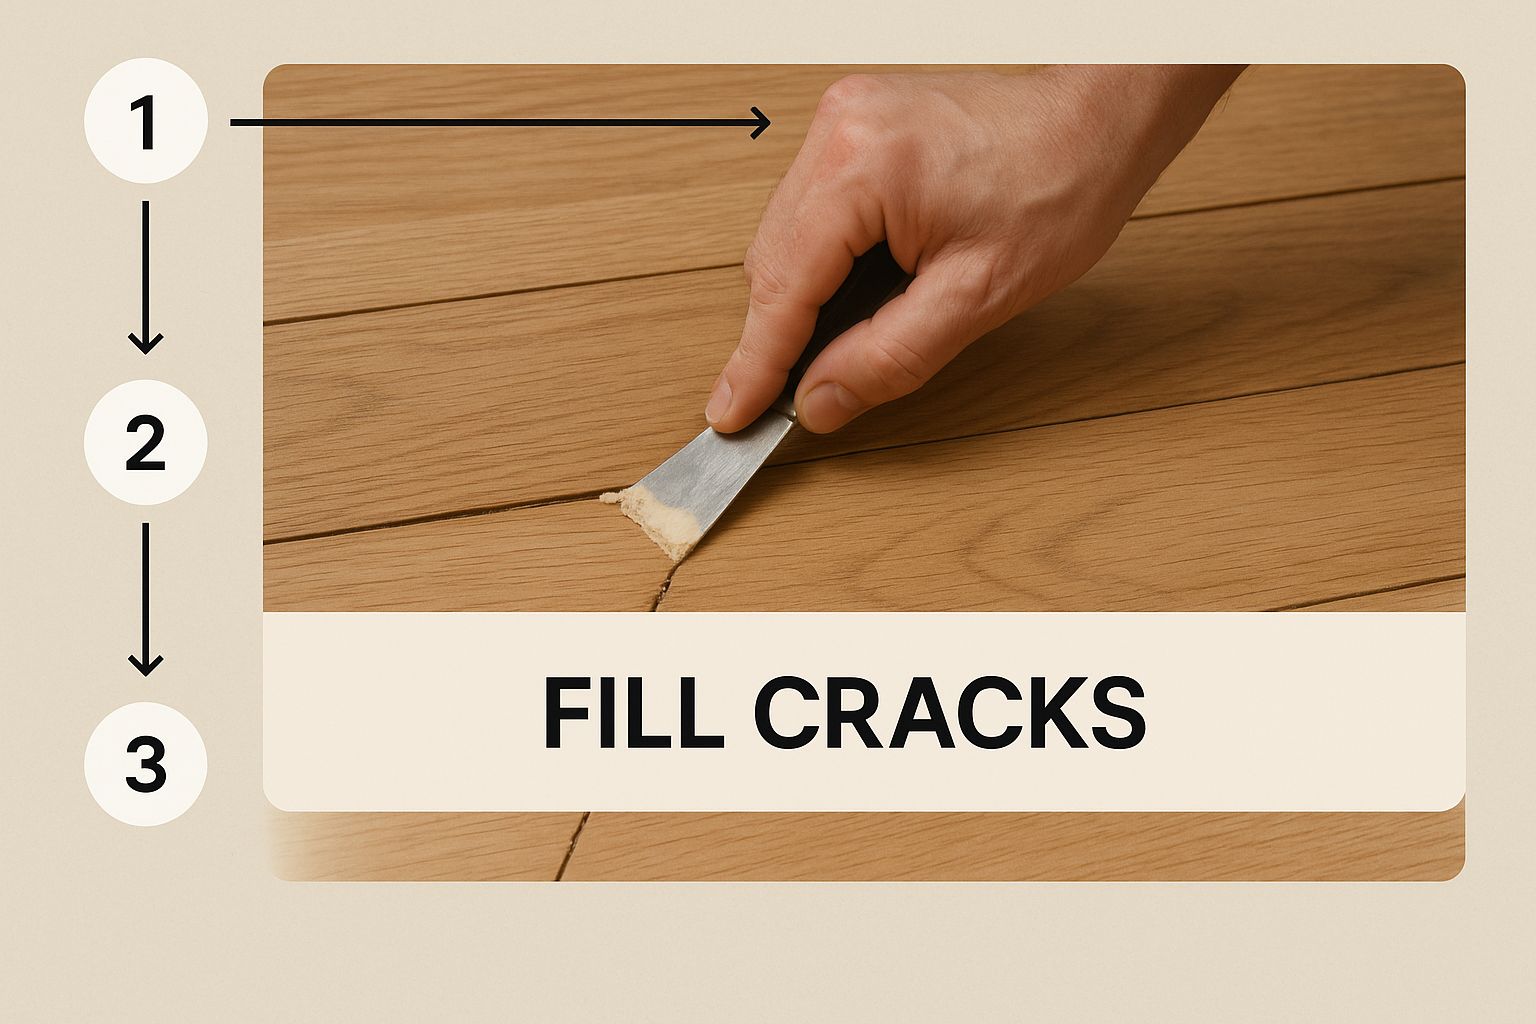
As you can see, you need a steady hand. You want to press the filler firmly into the space to create a solid, level repair that will last.
How to Replace a Badly Damaged Board
Sometimes, a board is just toast. Maybe it’s split clean through, warped from a plumbing leak, or has a deep, permanent stain from a pet. When a board is past the point of no return, a full replacement is your only real option. It demands precision, but trust me, it’s one of the most satisfying repairs you can do.
The entire game is about getting the bad board out without messing up its neighbors. It’s a bit like surgery.
Expert Tip: Before a single tool touches the floor, use painter’s tape to outline the damaged board. This gives you a bright, clear visual guide and acts as a buffer, helping prevent your saw from slipping and scarring the good boards next to it.
Here’s my go-to method for pulling a single plank:
- Set Your Saw Depth. This is critical. Grab a circular saw and set the blade depth to the exact thickness of your flooring. Any deeper and you risk cutting into your subfloor.
- Make Two Parallel Cuts. Cut two long lines right down the middle of the board. I usually aim for about an inch in from each edge. Don’t run the saw all the way to the ends of the board—stop a couple of inches short on both sides.
- Chisel the Ends. With a sharp chisel and a hammer, carefully cut across the grain at each end of the board to connect your two long saw cuts. This will free up the center strip.
- Pry It Out. Use a pry bar to lift out that center strip first. With the pressure relieved, the two remaining side pieces (which are locked in by the tongue and groove) should come out much more easily.
Once the old board is gone, grab a shop vac and clean every bit of dust and debris out of the opening. For the new board to fit, you’ll need to remove its bottom groove (the tongue) so it can drop in flat. A table saw or even a sharp utility knife can handle this. Dry fit it first to make sure it’s snug. Then, apply wood glue to the subfloor and the groove of the neighboring board, press the new plank firmly into place, and weigh it down with something heavy for a full 24 hours to let the glue cure completely.
Sanding and Finishing for a Flawless Blend
Alright, you’ve done the heavy lifting—filling that gouge or swapping out a damaged board. Now comes the real artistry. This is the stage that separates a decent repair from one that’s completely invisible. Sanding and finishing are all about making your work disappear into the rest of the floor.
The goal here isn’t just to slap some stain on it. We’re meticulously blending texture, color, and sheen. A rushed job at this point will stick out like a sore thumb, drawing everyone’s eye right to the spot you wanted to hide. Trust me, a little patience now pays off big time.
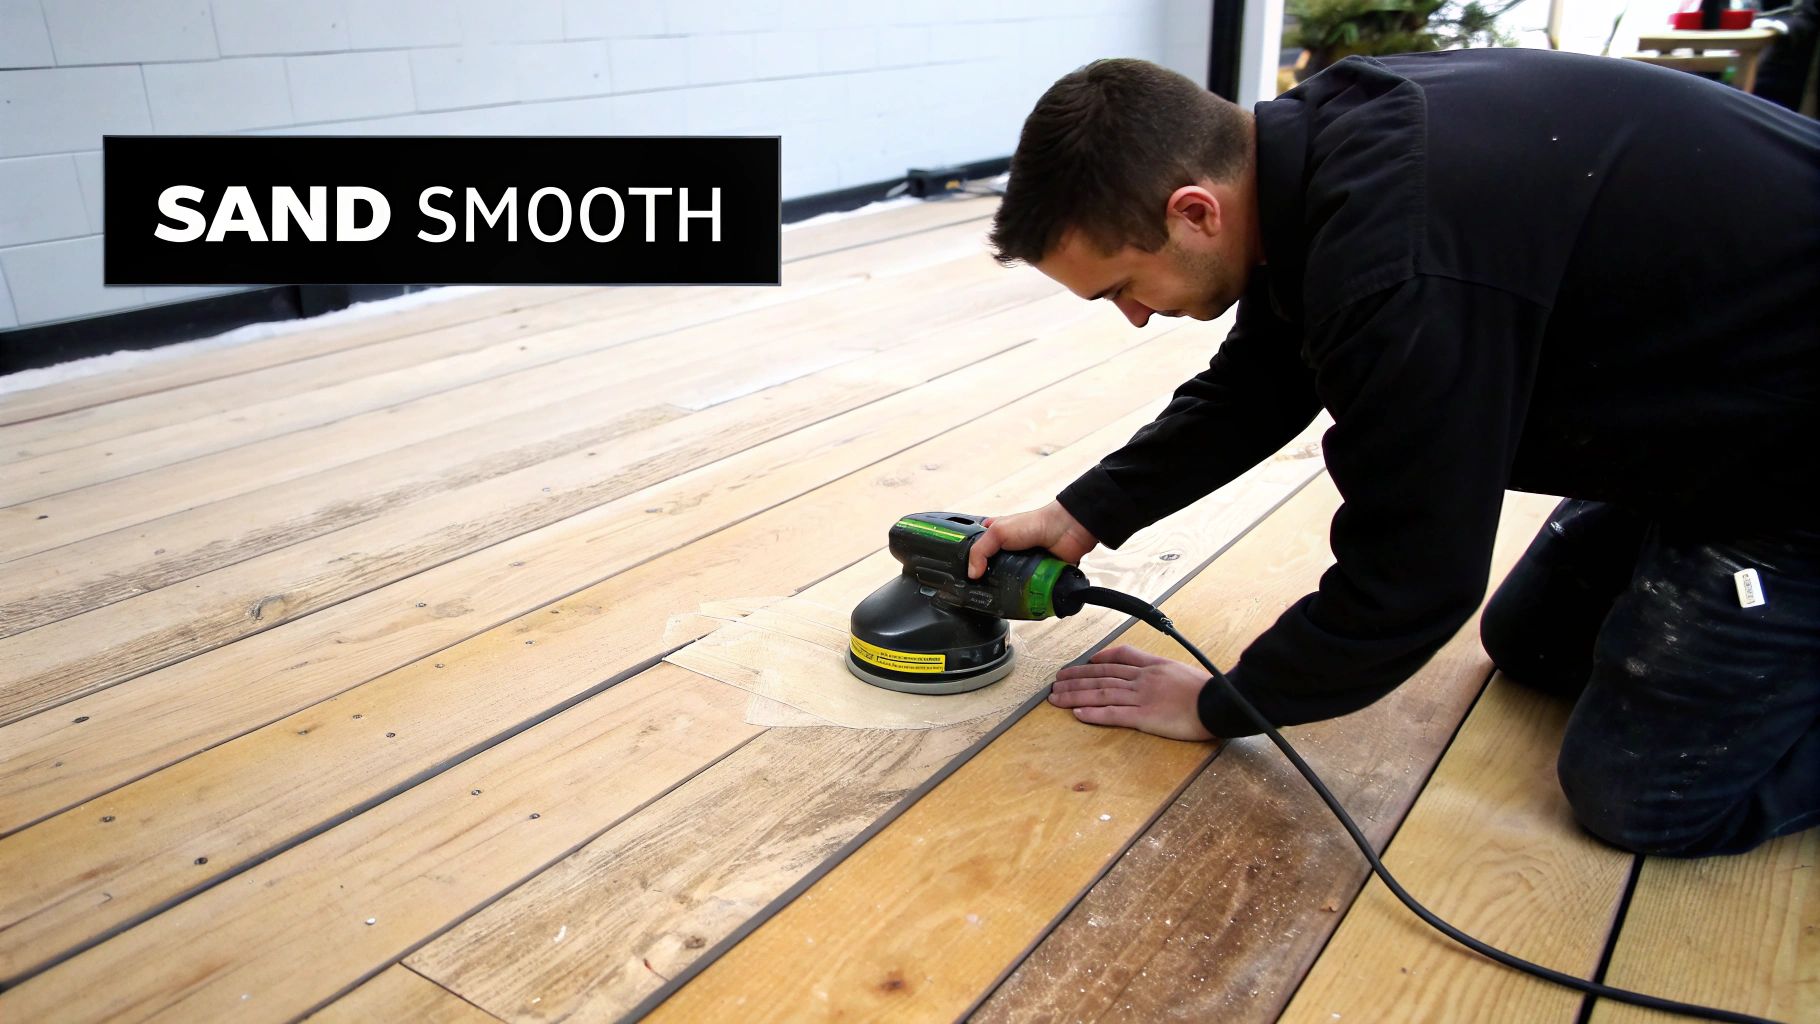
The Art of Sanding for a Smooth Transition
When it comes to sanding, think finesse, not force. You want to get the repaired spot perfectly level with the surrounding floor so it will take the stain evenly. I always start with a medium-grit sandpaper, something around 120-grit, wrapped securely around a sanding block for better control.
The golden rule? Always sand with the grain. If you go against it, you’ll leave tiny cross-hatch scratches that will scream for attention once the stain hits them. Use smooth, even pressure, focusing on the patch itself and then feathering your strokes out onto the existing floor. This feathering is key to avoiding a hard, noticeable line around your repair.
Next, I switch to a fine-grit paper, like 220-grit. This step is all about polishing the wood, buffing out any of the finer scratches left from the first pass. Once you’re satisfied, get the vacuum and be thorough—every last speck of dust has to go.
Color Matching and Staining the Repair
Matching the stain color is probably the trickiest part of the whole operation. Your floors have aged, seen sunlight, and changed color over the years. That means the original stain color you bought might not be a perfect match anymore. This is why you absolutely cannot skip the testing phase.
Always, and I mean always, test your stain in an inconspicuous area first. Inside a closet or under a big piece of furniture are my go-to spots.
Here are a few tips from my years of experience to get the color spot-on:
- Go Lighter First: You can always add another thin coat of stain to darken a patch. Lightening a spot that’s too dark is a nightmare.
- Use a Rag, Not a Brush: Applying stain with a clean, lint-free rag gives you far more control. You can work it into the wood and blend much more effectively.
- Blot and Blend: I dab a small amount of stain right in the middle of the repair, then use a clean section of the rag to work it outward, feathering the edges into the old finish.
If you’re taking on a bigger project and want to change the color of the entire floor, that’s a whole different ballgame. You can learn more about that process in our guide on restaining wood floors completely.
Applying the Protective Topcoat
The grand finale is applying the protective topcoat, typically polyurethane, to seal your work and match the sheen of the rest of the floor. You’ll need to know if your floor has an oil-based or water-based poly. Oil-based gives that classic amber hue and darkens over time, while water-based finishes dry clear. The best way to ensure a match is to use whatever is already on the floor.
Key Takeaway: The secret to a professional finish is applying several thin coats of polyurethane, not one thick one. Thin coats dry harder, last longer, and look infinitely smoother. For best results, lightly sand between coats with a very fine 320-grit sandpaper.
This focus on careful prep and finishing is what defines quality work, a principle that holds true across many home improvement trades. In fact, you’ll find similar advice in guides on professional surface preparation for painting, as the core concept is the same. It’s no surprise that homeowners are investing more in these details; the U.S. wood flooring market was valued at USD 6.33 billion in 2024, and it continues to grow as people see the value in quality renovations.
Answering Your Top Wood Floor Repair Questions
Even after walking through the steps, I know from experience that specific questions always pop up when you’re staring down at a damaged floor. Let’s tackle some of the most common ones I hear from homeowners so you can move forward with confidence.
Navigating Common Repair Scenarios
A big question I get is whether to fix just one spot or refinish the whole room. It really depends on the damage. If you’re dealing with a single deep gouge or a couple of bad scratches in one area, a spot repair is often all you need. But if you have widespread issues like fading from sunlight, or multiple damaged spots scattered across the room, refinishing the entire floor is the only way to get that seamless, uniform look. Trying to spot-treat too many areas can leave you with a patchy, uneven finish.
Pet stains are another frequent headache. The ammonia in pet urine can seep deep into the wood fibers, causing permanent blackening. If you catch a stain fresh, clean it immediately. For older, set-in stains, you can try sanding the spot and treating it with hydrogen peroxide, but sometimes, the only real fix for a severe stain is to replace the board entirely.
Pro Tip: Not sure if your floor has a wax finish? Here’s an easy test. Find a hidden spot, like under a rug or inside a closet, and put a single drop of mineral spirits on it. If the finish dulls or a clean cloth picks up a brownish residue, you’ve got a waxed floor, which needs a completely different approach to repair.
Getting familiar with your specific floor is the first step. This guide on timber flooring types, costs, and installation tips is a great starting point. For a deeper dive into more complex fixes, check out our ultimate guide to wood floor repair.
At Ramos Wood Floor LLC, we bring over a decade of hands-on expertise and a deep commitment to quality craftsmanship to every job. If your DIY project feels like it’s getting too big, our licensed professionals are here to deliver flawless refinishing, installation, and repairs.