
Need to bring your old floors back to life? Flooring refinishing can do just that. This guide covers everything from sanding to staining, ensuring you get stunning results.
Key Takeaways
- Refinishing hardwood floors involves sanding, staining, and applying a protective finish to restore beauty and value.
- Preparing the room and evaluating the floor’s condition are crucial steps for a successful refinishing process.
- Using the right tools and techniques, including proper sanding and applying multiple coats of polyurethane, leads to a professional-looking finish.
Understanding the Basics of Flooring Refinishing
Refinishing hardwood floors involves a series of steps designed to restore their original beauty and extend their lifespan. The process typically includes sanding, staining, and applying a new finish to the wood floors. Removing the old finish and smoothing out imperfections significantly enhances the appearance of your floors.
Refinishing hardwood floors involves straightforward steps that require attention to detail:
- Sand the floors to remove any old finish and surface imperfections.
- Apply a wood stain to achieve the desired color and enhance the wood grain.
- Seal the wood with a protectiveuubru finish to provide a durable surface. To refinish hardwood floors, follow these steps carefully.w
Refinishing your hardwood floors is more than just a cosmetic upgrade. It revitalizes the wooden floors, enhancing their beauty and increasing the value of your home. Whether you’re dealing with minor damages or just looking to give your floors a fresh look, refinishing is a cost-effective way to achieve stunning results.
Evaluating Your Wood Floors
Before you start the refinishing process, it’s crucial to evaluate the condition of your wood floors. Assessing the floors helps identify any necessary repairs and ensures the best possible outcome. Take the time to inspect your floors for deep scratches, dents, and other imperfections that may need addressing.
Look for signs of wear, such as cupping, crowning, and discoloration. These issues may require sanding iíiiviiviiiuuiiv to remove the damaged surface layers. If there are visible damages, they should be completely sanded down before refinishing to avoid making them more noticeable once the finish is applied.
Thoroughly evaluating your bare wood floors helps determine the extent of work needed and allows for proper planning. This step is essential for achieving a smooth, even finish that highlights the natural beauty of your hardwood floors.
Essential Tools and Materials for Refinishing
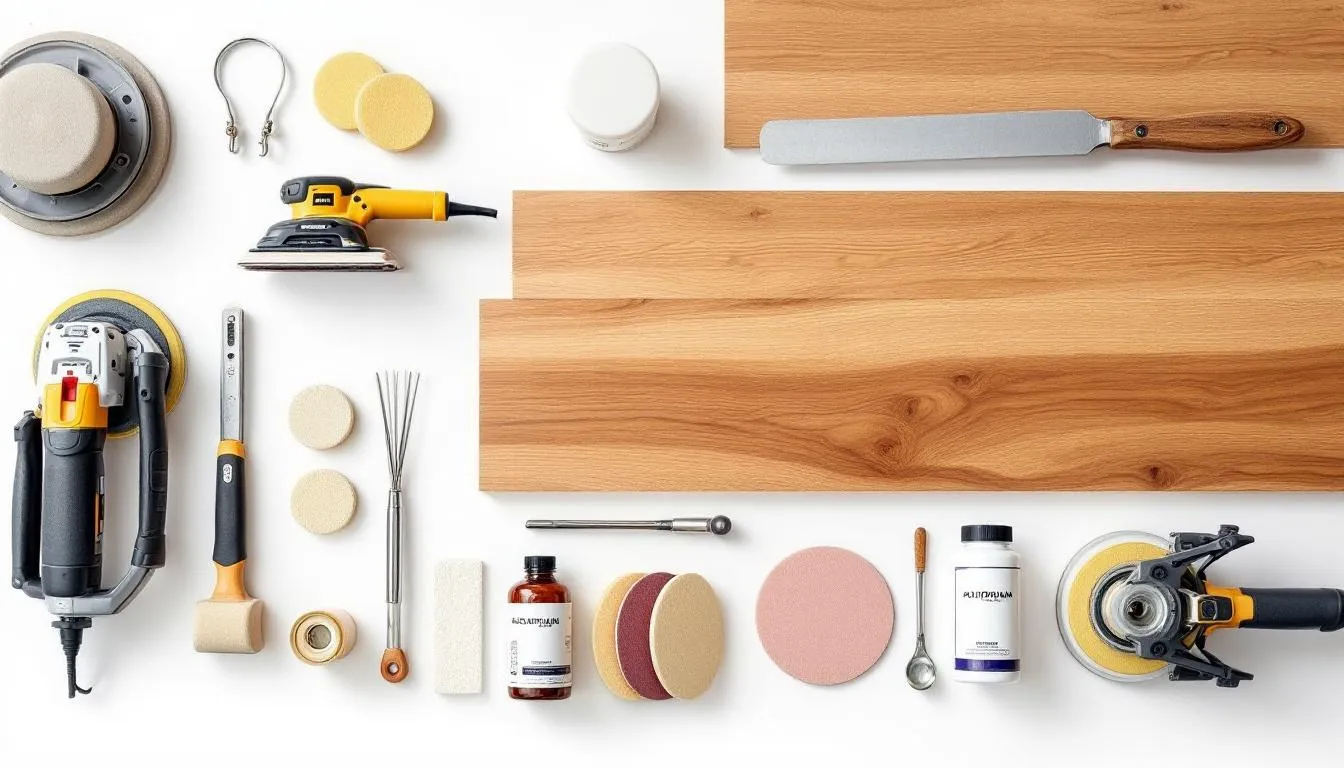
Successfully refinishing hardwood floors requires a variety of tools and materials. The primary tools include:
- Floor sander
- Edge sander
- Mouse sander
- Shop vac Each plays a crucial role in the sanding and refinishing process.
Different sanders serve specific purposes:
- An edge sander is designed for reaching areas that larger sanders cannot access.
- Achieving a consistent finish along the edges and corners of the room is essential.
- A palm sander or random orbital sander is useful for touch-ups and finer sanding.
Don’t forget about the necessary material. Plastic sheeting is invaluable for protecting furniture and other items from dust and debris during the process. Having all the right tools and materials beforehand ensures a smoother and more efficient refinishing process.
Preparing the Room for Refinishing
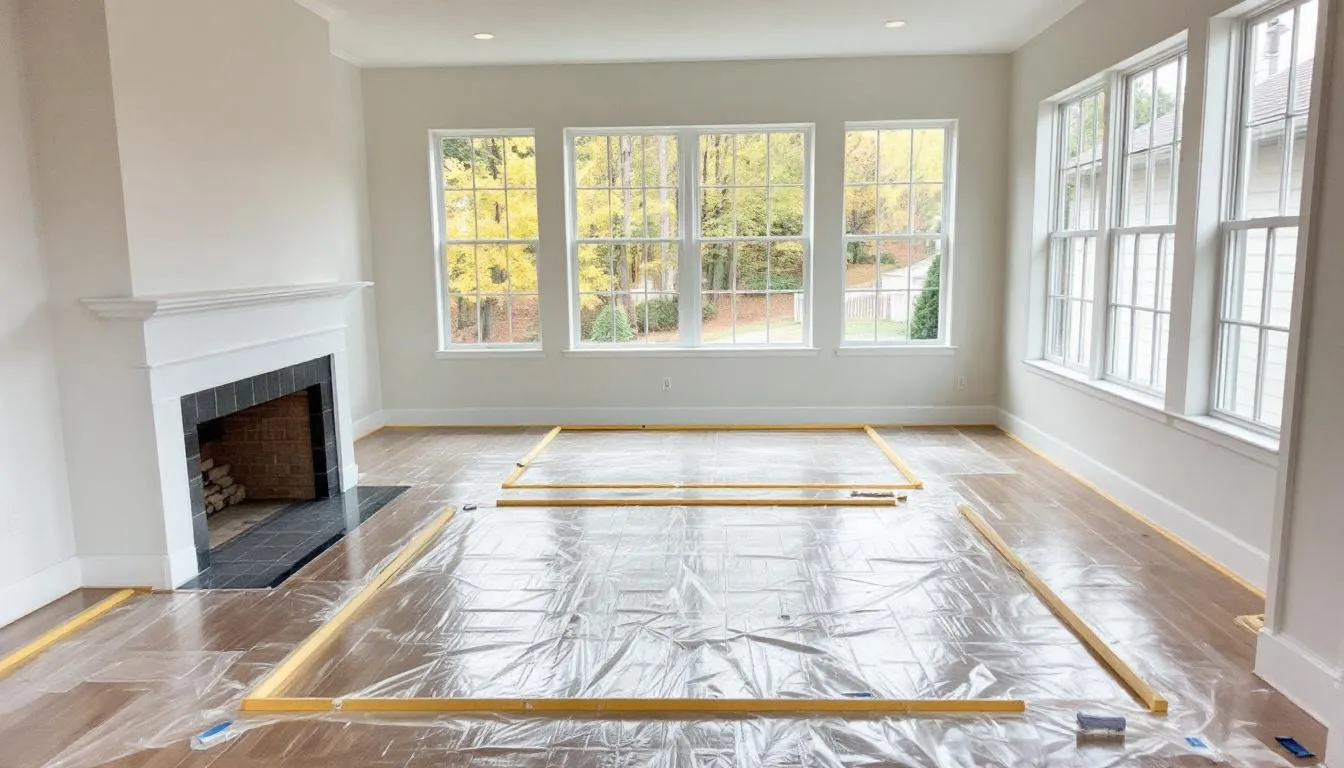
Preparing the room properly is critical in the refinishing process. Start by removing all furniture and rugs from the area. This ensures that nothing gets in the way during sanding and staining, and helps prevent damage to your belongings.
Next, cover vents and doors with plastic sheeting to contain dust and minimize its spread throughout your home. Covered vents and doors with plastic sheeting and electrical outlets help keep the rest of your house clean and reduce cleanup time after the wall project is complete.
Finally, thoroughly clean the floor with a suitable cleaner before any sanding begins. Removing dust and debris from the floor surface ensures a better sanding process and helps achieve a smooth, even finish.
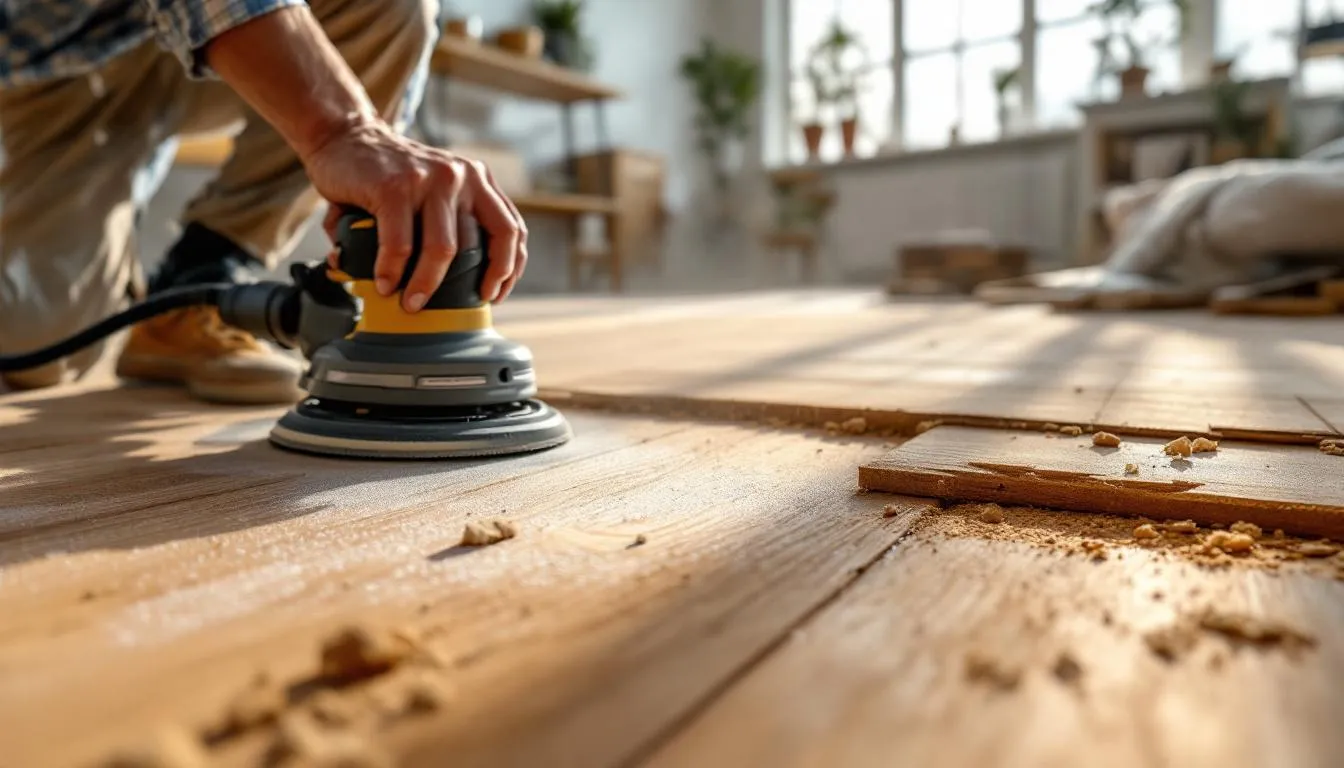
The Sanding Process Explained
The sanding process is the heart of refinishing hardwood floors. The main goal of sanding is to remove the old finish and smooth the surface, preparing it for staining and finishing. Start with a drum sander to efficiently sand the main areas of the floor.
Begin with rough grit sandpaper, such as 36 grit, to remove the old finish and surface imperfections. Progress to 60 grit sandpaper for the second pass, and finish with 100 grit for the smoothest results. This progression ensures that the floor is adequately prepared for the next steps.
Tips for effective sanding:
- Apply consistent pressure and pacing to avoid creating uneven spots.
- Overlap each pass by a couple of inches to achieve a uniform finish.
- Avoid sanding too little, as it can leave behind imperfections that become more noticeable after the finish is applied.
Choosing the Right Grit Sandpaper
Choosing the right grit sandpaper is crucial for a successful refinishing job. Start with coarse sandpaper, such as 36 or 40 grit, to remove the old finish and any surface imperfections. This initial step is vital for setting the stage for a smooth finish.
After the initial sanding, progress to finer grits like 60 grit and finally 100 grit. Each step with finer sandpaper further smooths the surface, making it ready for staining and finishing. This progression ensures that the wood floor is even and free of any remaining imperfections.
Using finer grit sandpaper after the coarse grits enhances the smoothness of the floor, creating a perfect surface for staining and finishing. This ensures a professional-quality finish that highlights the natural beauty of the wood grain.
Handling Corners and Edges
Sanding the corners and edges of the floor can be challenging, but using an edge sander or a belt sander can make the job easier. An edge sander reaches larger areas that larger sanders cannot, ensuring a consistent finish throughout the room.
For tight corners and hard-to-reach tight areas, consider using a palm sander or hand sand. These tools provide greater control and precision, ensuring every part of the floor is evenly sanded and ready for the next steps. Proper technique in these areas is crucial to avoid uneven sanding and achieve a flawless finish with sanding pads.
Filling Gaps and Imperfections
Addressing gaps and imperfections in your hardwood floors is an essential step in the refinishing process. Key points to consider include:
- Identifying the cause of gaps, such as humidity changes or natural wood expansion, is crucial for effective repair.
- Small to medium-sized gaps can be effectively filled with wood filler.
- Wood filler is available in various colors to match your flooring.
For larger gaps, consider using soaked natural fiber rope or twine. This method is visually appealing and effective, providing a seamless look. Alternatively, wood strips or slivers can be used for wider gaps, requiring cutting matching hardwood and gluing it in place.
In cases of extensive gaps and damage, professional hardwood floor restoration may be necessary. This process involves more advanced techniques, such as sanding and using specialized fillers, to ensure a flawless finish. Replacing damaged floorboards is another option when gaps are too large to fill effectively.
Staining Your Hardwood Floors
Staining your hardwood floors is a crucial step in achieving the desired color and enhancing the wood grain. Water-based stains dry clear and do not alter the natural color of the wood, making them ideal for light-colored woods. On the other hand, oil-based stains can impart a warm amber hue and typically have a richer appearance and depth.
When applying the stain:
- Use a high-quality applicator.
- Follow the wood grain while maintaining a wet edge to ensure an even application and prevent streaks and blotches.
- Test the stain in an inconspicuous area before applying it to the entire floor to ensure the final color meets your expectations. This step by step guide will help you achieve the best results.
Applying multiple coats of oil-based stain usually requires more drying time compared to water-based stains. However, the depth and richness of the color can make the extra time worthwhile. Whichever type of stain you choose, proper application techniques are key to achieving a beautiful, even finish.
Applying the Polyurethane Finish
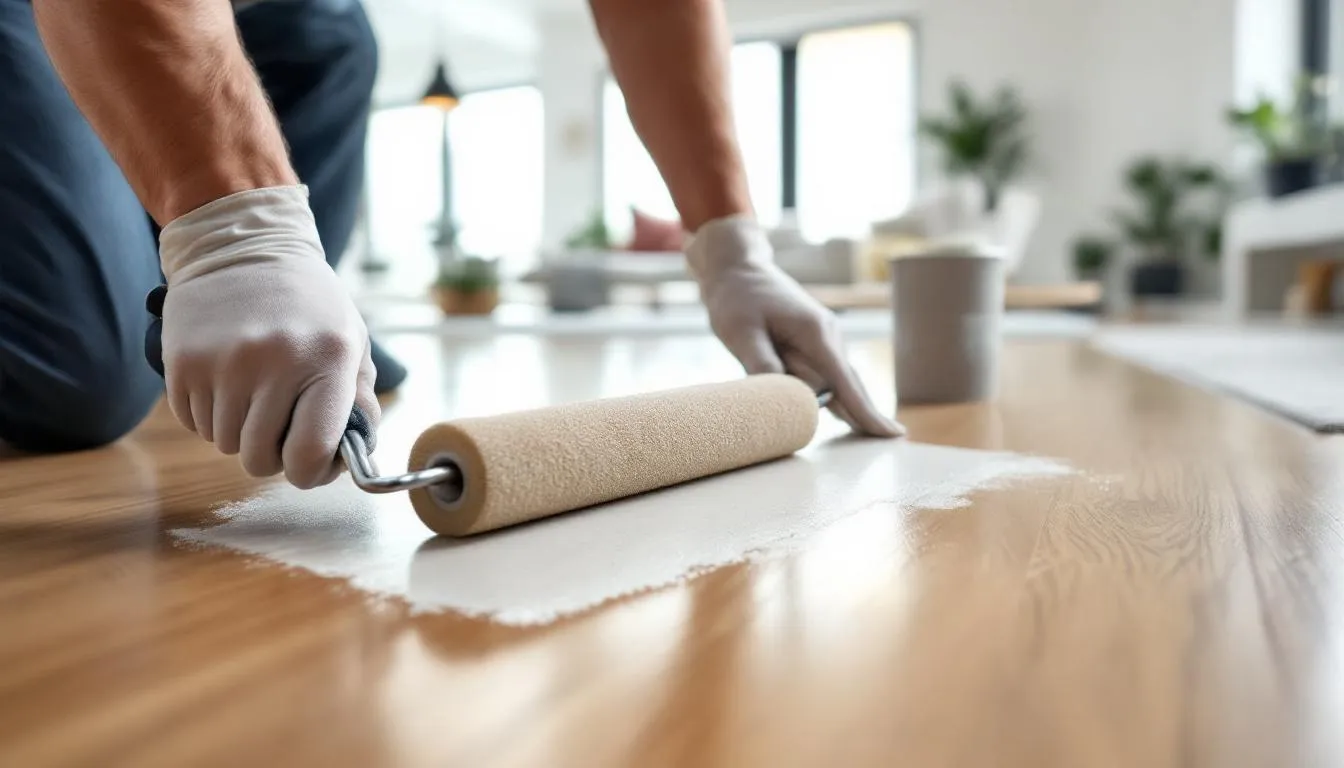
The polyurethane finish is the final protective layer for your hardwood floors, providing durability and enhancing their beauty. The existing finish of water-based polyurethane is recommended for its quick drying time and low odor, making it a convenient option for many homeowners.
When applying polyurethane, follow these steps:
- Use a brush, pad, or lambswool applicator and follow the direction of the wood grain to ensure a smooth, even coat.
- Let the first coat dry for a minimum of two hours before applying additional coats.
- Lightly sand between coats to ensure a smooth finish on the top coat.
For optimal protection, a total of three coats of polyurethane are typically advised. This ensures that the floors are well-protected and have a long-lasting finish. The drying time for water-based finishes generally ranges from 2 to 8 hours, while oil-based finishes can take 4 to 24 hours to dry to the touch.
Applying the polyurethane finish requires patience and attention to detail. By following these steps and allowing adequate drying time between coats, you can achieve a professional-quality finish that enhances the natural beauty of your hardwood floors.
Curing Time and Final Steps
After applying the final coat of polyurethane, it’s important to allow ample curing time before placing any furniture on the floor. Even if the floor feels dry to the touch, it’s advisable to wait at least 24 hours to ensure the finish is fully set and durable.
To prevent uneven sheen or dull areas, avoid covering the floors with rugs until the finish has completely cured. This is crucial for maintaining the beauty and longevity of your refinished floors.
Thoroughly clean surfaces with a vacuum or tack cloth after sanding to sweep away saw dust before applying the next coat. This ensures a smooth, even finish and prevents any particles from getting trapped in the final coat.
Summary
Refinishing hardwood floors is a rewarding DIY project that can transform your home. By following the step-by-step guide, you can achieve professional-quality results and breathe new life into your wood floors. From understanding the basics to mastering techniques like sanding and staining, each step is crucial to achieving a flawless finish.
The benefits of refinishing hardwood floors go beyond aesthetics. It revitalizes the wooden floors, enhancing their beauty and increasing the value of your home. Whether you’re dealing with minor damages or just looking to give your floors a fresh look, refinishing is a cost-effective way to achieve stunning results.
So, roll up your sleeves and get started on your DIY adventure. With the knowledge and confidence gained from this guide, you’ll be able to transform your hardwood floors and enjoy the sense of accomplishment that comes from doing it yourself.
Frequently Asked Questions
How long does the entire process of refinishing hardwood floors take?
Refinishing hardwood floors usually takes about 3 to 5 days, depending on the area size and drying times. Just keep in mind that each step needs its own time to properly cure!
Can I walk on the floors during the refinishing process?
You really should avoid walking on the floors while they’re being refinished. Giving them time to dry properly will ensure you get a smooth and long-lasting finish.
Do I need to remove baseboards before refinishing hardwood floors?
You don’t necessarily have to remove the baseboards, but doing so can simplify the refinishing process and help achieve a more polished look. If you choose to keep them, just be cautious when working around those edges.
What type of wood filler should I use for gaps in my hardwood floors?
For gaps in your hardwood floors, use a wood filler that closely matches your flooring color—either a pre-colored option or one you can stain to match. For bigger gaps, you might want to go with soaked natural fiber rope or wood strips for a better fit.
How many coats of polyurethane finish should I apply?
You should apply three coats of polyurethane finish for optimal protection and durability. This will give your floors the best chance to look great and withstand wear.